

 LinkBack URL
 About LinkBacks

How to upgrade unofficial Android 4.1.1 Jelly Bean on Samsung Galaxy Nexus GT-i9250
Requirements
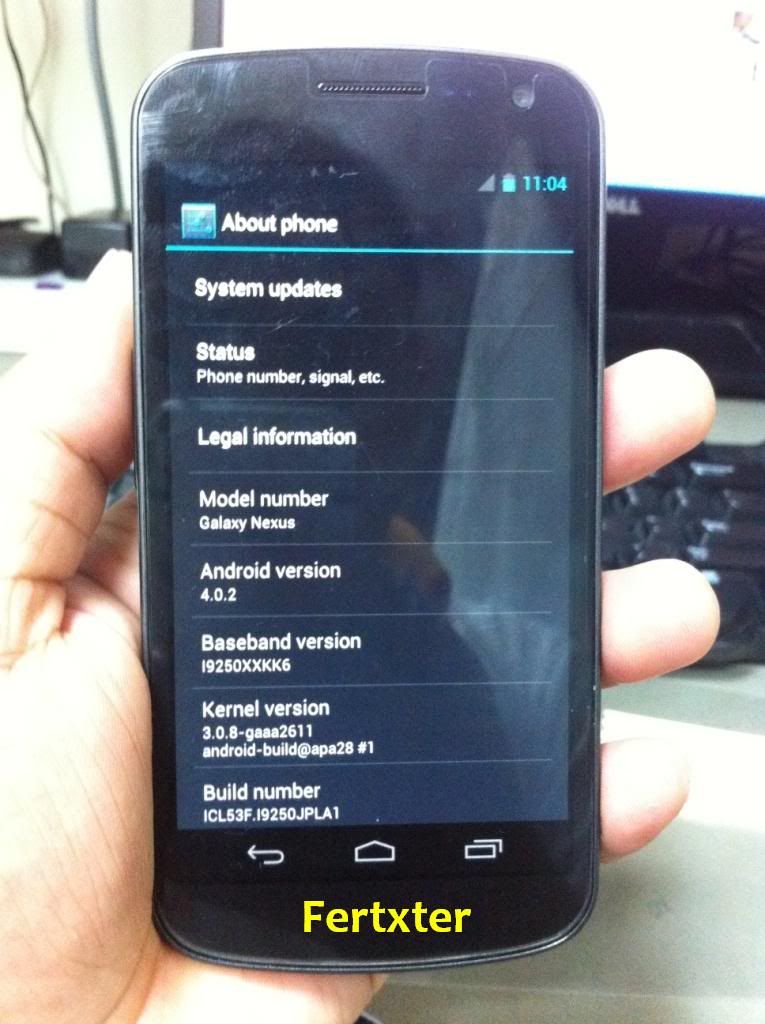
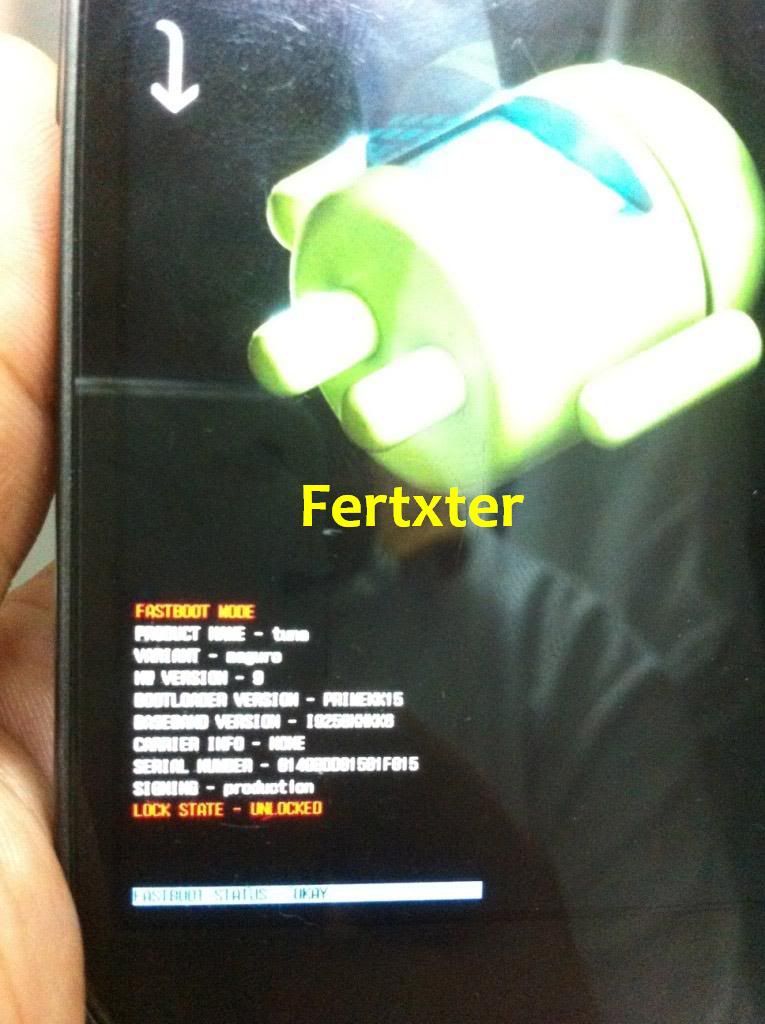
Rooted Samsung Galaxy Nexus with unlocked bootloader and Recovery installed.
*You can check these guides on how to unlock the bootloader of the Galaxy Nexus GT-I9250 and how to install Recovery on the Galaxy Nexus GT-I9250.
Download the Jelly Bean ROM (bigxie_maguro_JRO03C.zip, md5sum: 7f43fb5677550561b2aebdec02f70b6f). You can also download the ROM from the following alternate links:
Mirror 1
Procedure
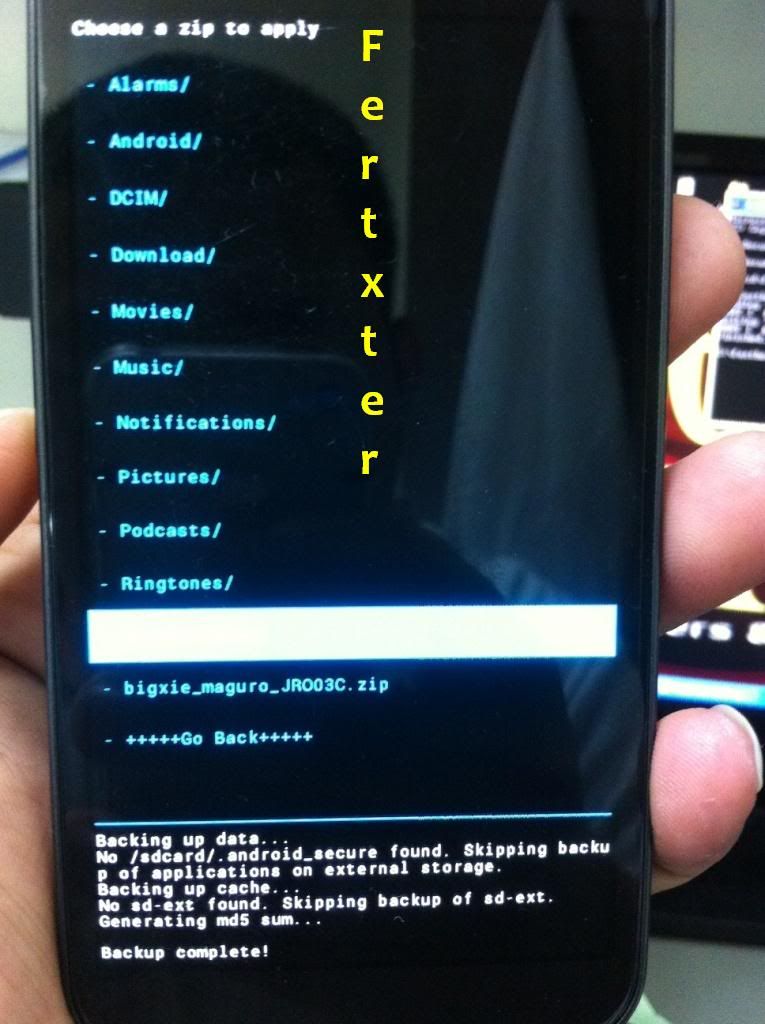
1: Copy the bigxie_maguro_JRO03C.zip file to your phones SD card.
2: Switch off your phone.
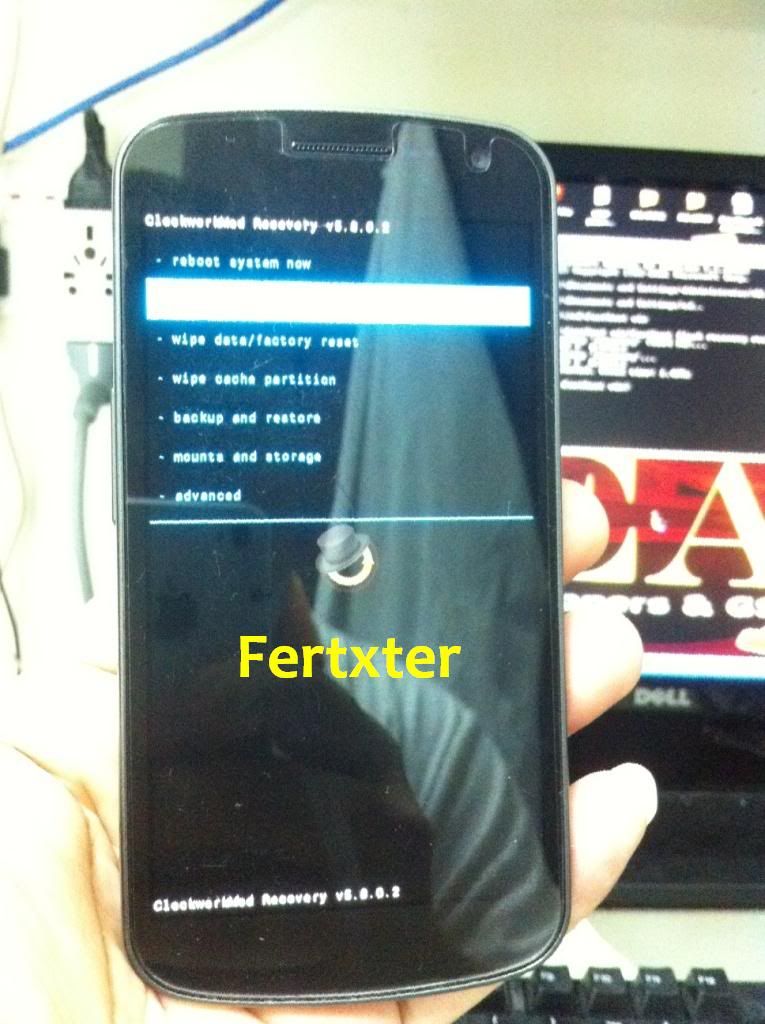
3: Boot into Recovery. You can do this by pressing and holding down the Volume Up, Volume Down and Power buttons together until your phone screen turns on. Select the Restart Recovery option.
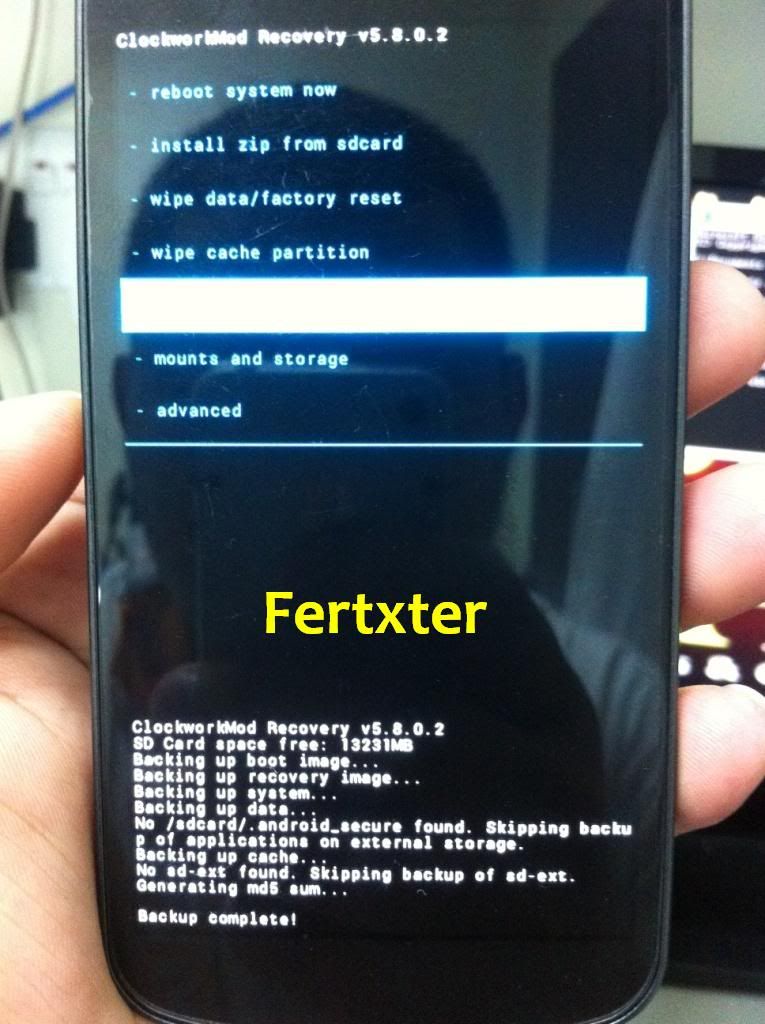
4: Once in Recovery Mode, select Backup then slide the blue circle button found at the bottom to backup your current ROM. After backup is complete, head back to the main menu by selecting the Home button found at the bottom left of the screen.
5: Select Wipe then select Factory Reset to confirm data wipe. Head back to the main menu by selecting the Home button after the wipe is complete.
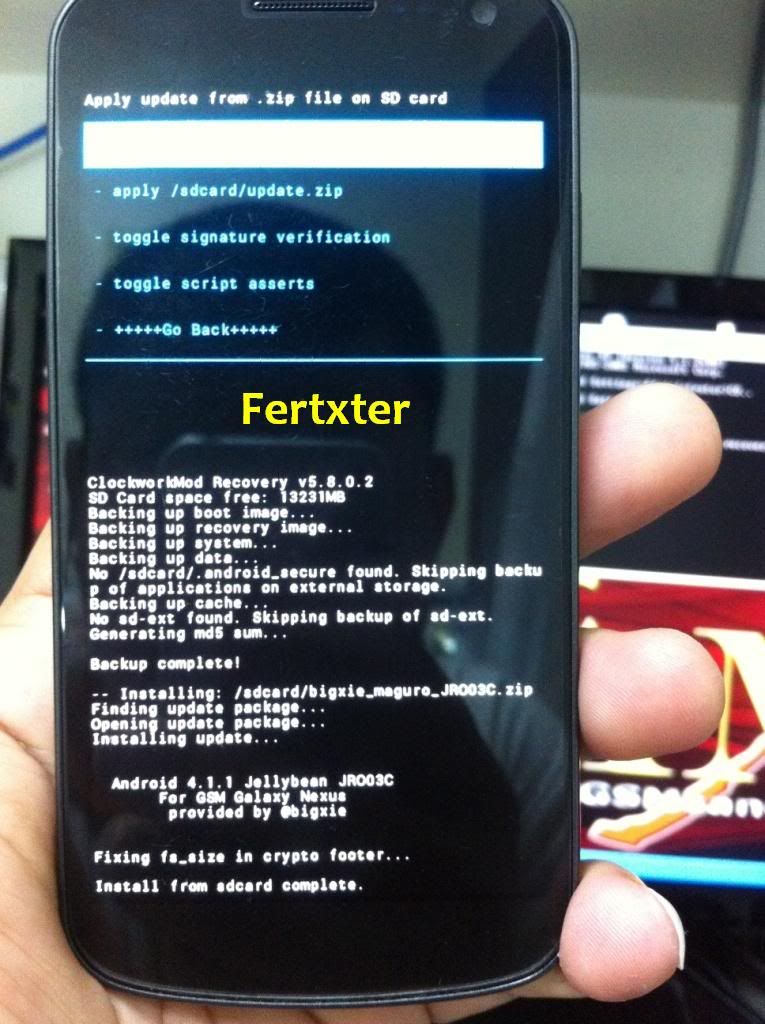
6: Select Install then browse for the downloaded ROM file on your SD card and select it. Confirm the installation by tapping the blue button. It may take 5-10 minutes for the installation process to complete.
7: Select Reboot System to reboot your phone.
Congratulations! The unofficial Android 4.1.1 Jelly Bean ROM has now been installed on your Samsung Galaxy Nexus GT-I9250.
MY Finish Product
[yt]http://www.youtube.com/watch?v=Bi1fyC8gKpk&feature[/yt]
.


Bookmarks